How to Take Screenshots on Lenovo (ThinkPad & Yoga)
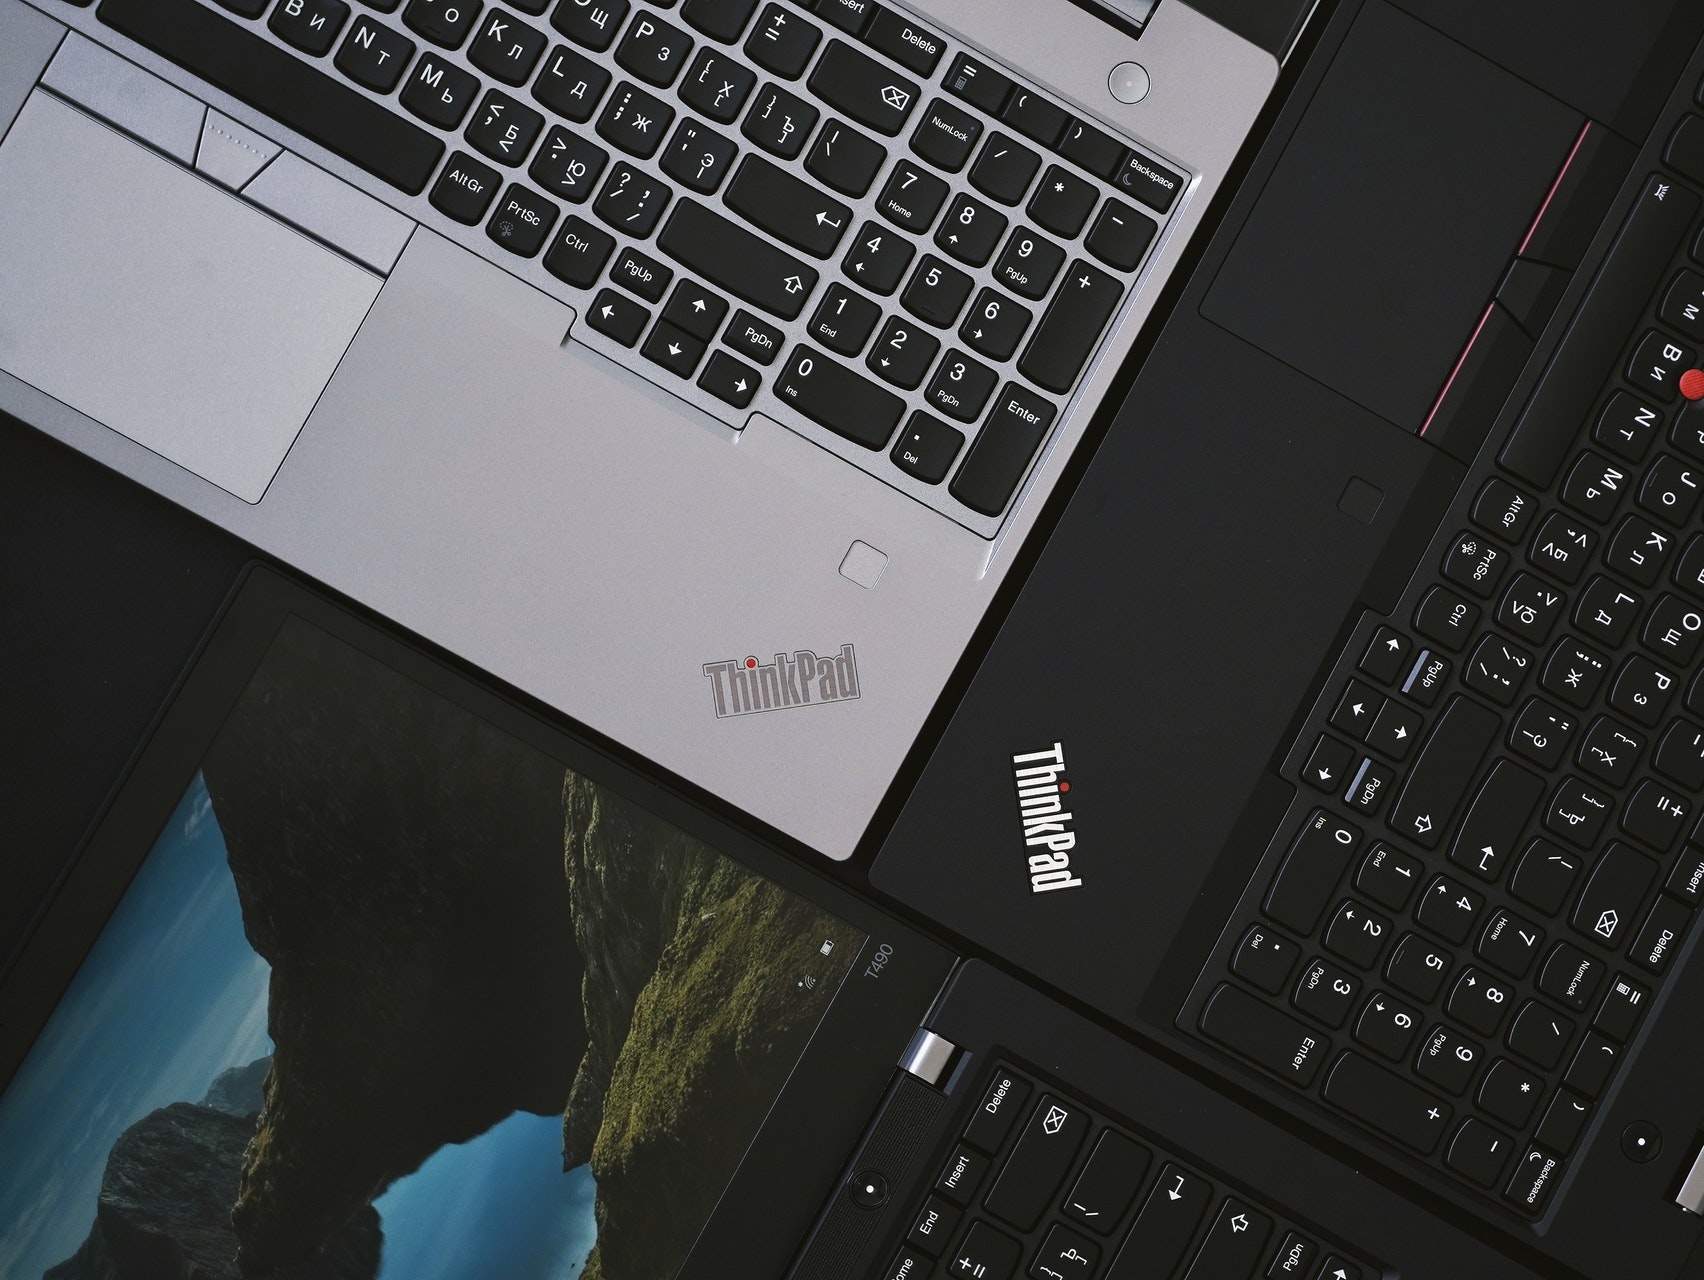
Apr 29, 2021If you have recently bought a Lenovo ThinkPad device and you need to know how to take a screenshot, you are in the right place. The ThinkPad line of laptops by Lenovo include the business-oriented ThinkPad X1 Titanium Yoga, the performance-oriented ThinkPad P17 and the budget-friendly ThinkPad E14. However, some may prefer the lightweight Web-oriented Lenovo Chromebook Duet. All devices mentioned so far have screenshot capabilities although, you might need to consider using a dedicated screenshot utility for maximum comfort.
How to take a screenshot on a ThinkPad X1 Titanium Yoga using Windows?
The ThinkPad X1 Titanium Yoga by Lenovo features a keyboard that includes a dedicated key for making screenshots in Windows, however, the functionality is very basic. Pressing the screenshot key would capture the entire content on your screen (including the Windows taskbar). The key you are looking for is titled “PrtSc” and it is placed next to the Alt key on the right side of the keyboard. Here is a where the screenshot key should be:
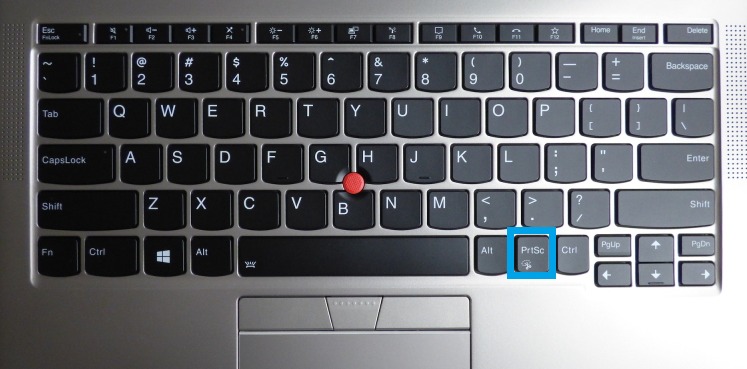
You will not find the screenshot image saved on your memory drive, instead, Windows will keep the screenshot in the system memory. You will have to paste the image in an image editor to save the file. Alternatively, you can paste the image in an instant messaging app or the body of an email to see the screenshot.
How to take a screenshot on a ThinkPad P17 mobile workstation?
Lenovo is known for making quality laptops and one of their best performance propositions is the ThinkPad P17 device which includes a dedicated screenshot button on the keyboard as well as useful quick buttons for opening/closing calls in IM apps, sharing your screen and others. The keyboard in the ThinkPad P17 mobile workstation is almost identical compared to the one in the ThinkPad X1 Titanium Yoga and the major difference is that you have a full-featured numpad. The keyboard layout will show you where the screenshot button is located:
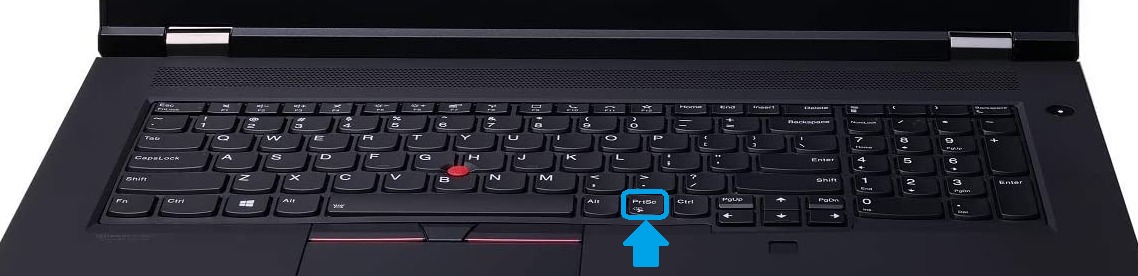
Please, note that the screenshot function in the ThinkPad P17 device is the same as most other Lenovo laptops. Pressing the button a single time is enough to capture the opened windows on your screen, movie frames and the Windows taskbar. You cannot customize how the “PrtSc” key behaves without using a screenshot utility.
How to take a screenshot on a Lenovo ThinkPad device and customize it?
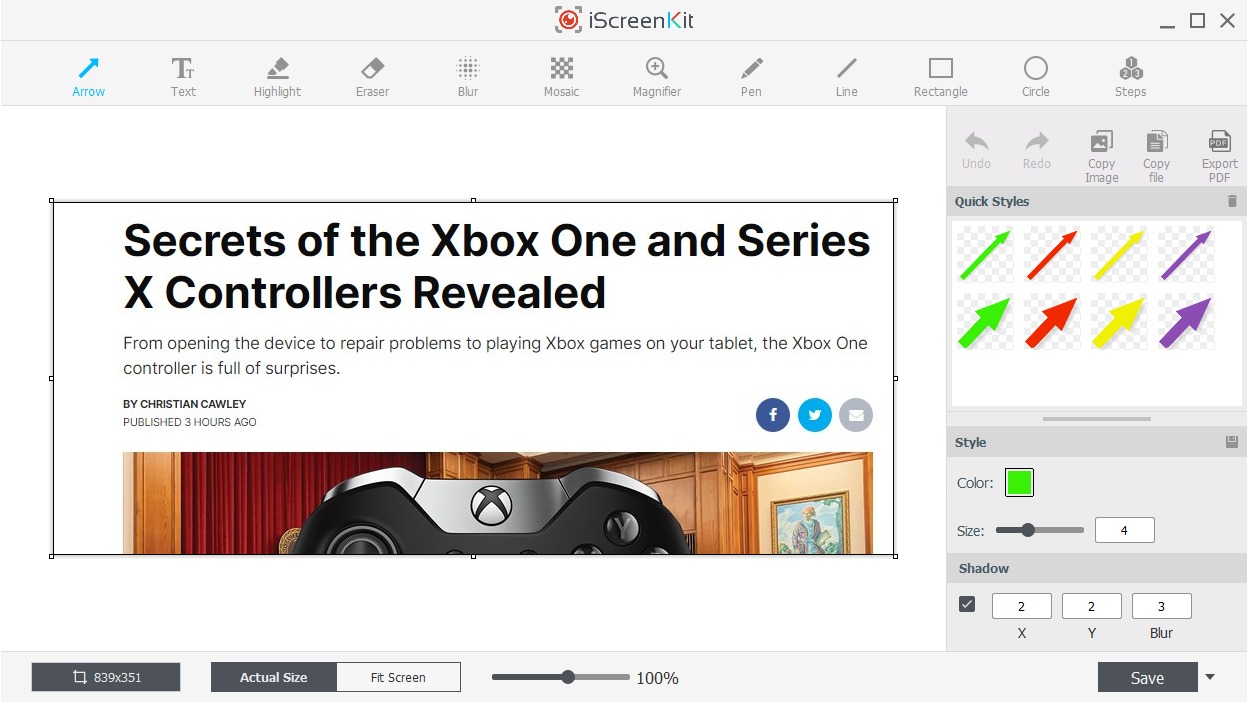
I recommend using the iScreenKit program that can run in the Windows background and it will not interfere with your everyday work. The iScreenKit program can change how the “PrtSc” works on the Lenovo laptop and allow you to take screenshots easily and add useful pointers quickly. The iScreenKit program is designed to help users capture their entire screen or portion of the screen space as well as add effects, arrows and text as needed. Here is how the screenshot selection tool looks in action:
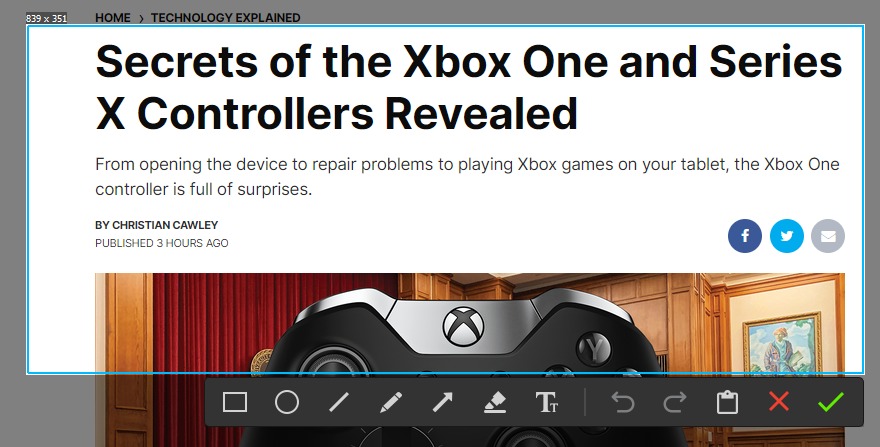
The default settings in the app dictate that a single press of the “PrtSc” on your keyboard is all you need to engage the app. You will be able to capture the entire screen or a part of it by holding the left mouse button and dragging the mouse to create a rectangular selection as shown above. Once you have your screenshot ready, just click the green checkmark and you are done.
The screenshots taken with iScreenKit are saved to “C:\Users\youraccountname\Documents\iScreenKit'' by default and you can change the location if you like. Additionally, you can find the screenshot inside the iScreenKit program window as shown below:
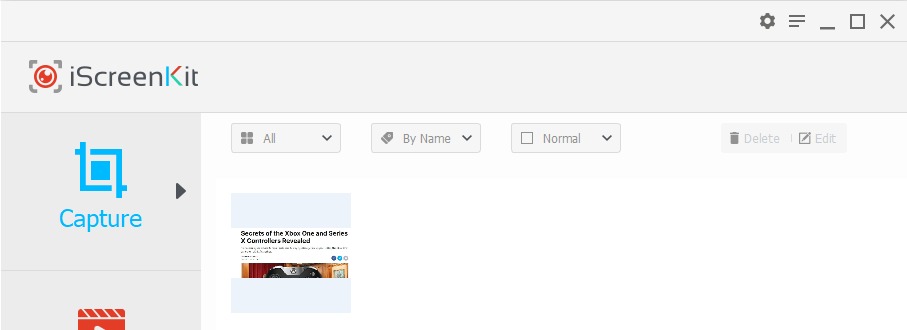
The iScreenKit program can be used to edit screenshots on all models of ThinkPad laptops by Lenovo. A brief preview of the editing options is presented below:
How to take a screenshot on a Lenovo Chromebook Duet?
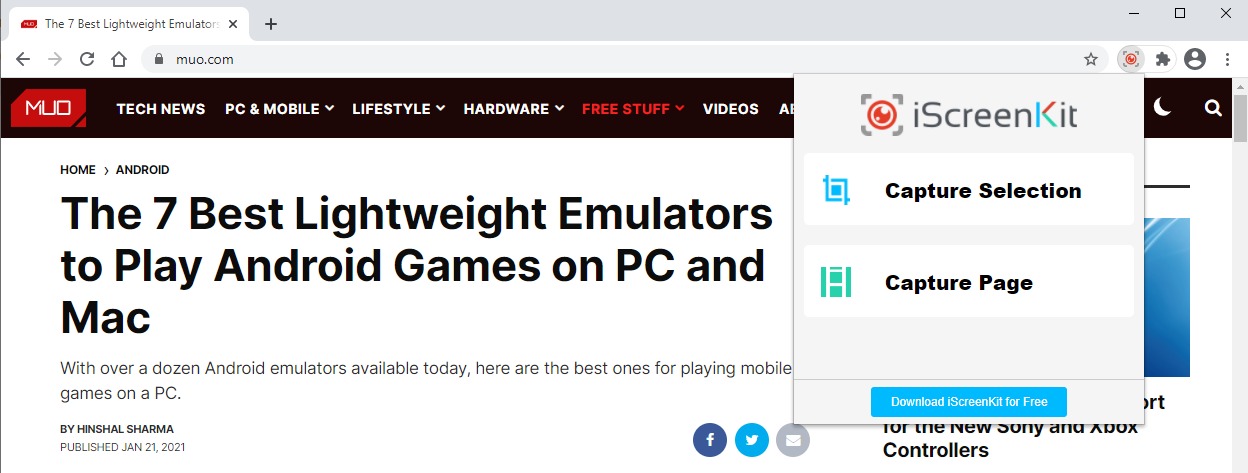
If you are using a Chromebook Duet device by Lenovo and you want to take screenshots, you can install the iScreenKit extension for Google Chrome from here. The extension will be situated in the top right corner of Chrome’s window and can be used to take screenshots of frames on video streaming sites like YouTube, articles on news outlets and diagrams online like so:
Step 1 - click the icon for the extension and chose your screenshot type (a full page or a part of the page)
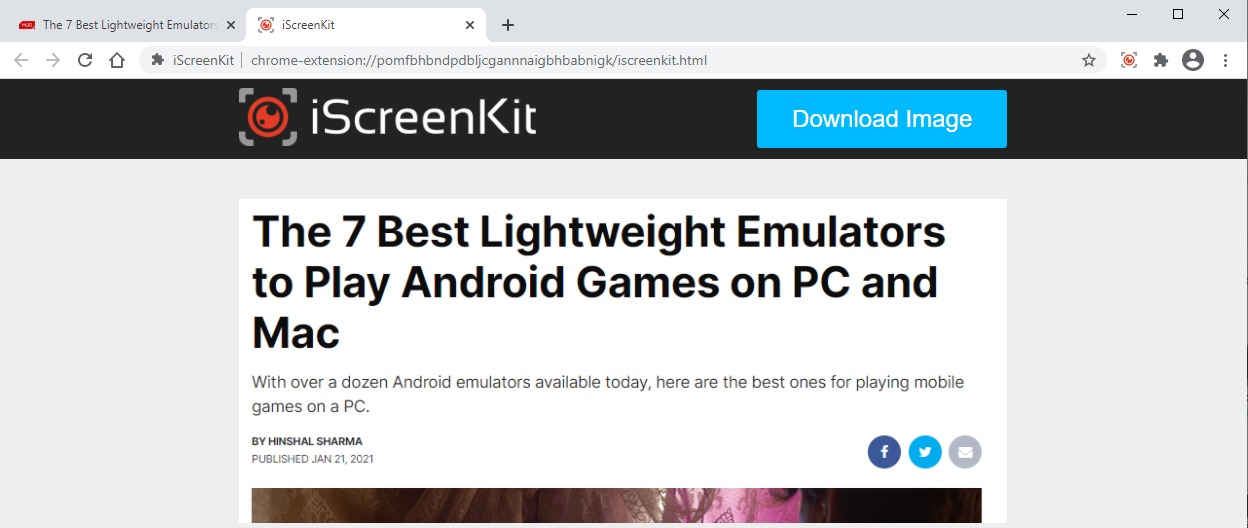
Step 2 - hold the left mouse button and drag a rectangular window over what you need to screenshot or wait for iScreenKit to photograph the entire page.
Step 3 - go to the new tab in your browser and save your screenshot to your Chromebook or copy the image and paste it into another app or a browser tab.
Sadly, the iScreenKit browser extension does not have all bells and whistles that you will find in its desktop counterpart. If you need to improve the screenshots taken with the browser extension I recommend using an image editor that runs on a Chromebook until the iScreenKit extension is improved. A few apps that you might want to check are Snapseed by Google and GIMP for Linux (Chrome OS runs many Linux-based apps).
We hope that this article helps you take advantage of your Lenovo ThinkPad laptop better. If you might need help with taking screenshots on other devices, please check our other articles.