How to take screenshots and screen record on iPhone and iPad
Apr 07, 2021Apple has released quite a few new iPhone models since their big breakthrough back in 2014 when they brought us the iPhone 6. Apple has also brought us a few controversial changes to the otherwise loved and relied upon iPhone design like the removal of the audio jack and the removal of the Home button. If you have recently upgraded from an old iPhone model, taking screenshots might not be as familiar and easy as you might remember. This is where we come in to provide a few useful tips for you.
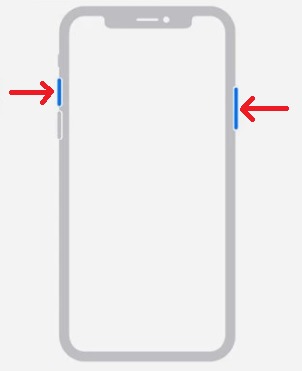
How to make a screenshot on an iPhone with a Face ID?
Press the “Side Button” and the “Volume Up” buttons at the same time followed by a quick release. A preview window will be shown in the bottom left corner of your screen which you can swipe away or click on it. If you decide to open the screenshot, you will be able to draw over parts of the image, save it, and send it directly through email, chat, and social media apps.
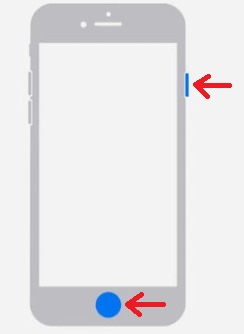
How to make a screenshot on an iPhone with a Touch ID and a Side Button?
Press the “Side Button” and the “Home” buttons at the same time followed by a quick release. Again, you will see a thumbnail appear on your screen and you will be able to edit the image and send it.
How to make a screenshot on an iPhone with a Touch ID and a Top Button?
Press the “Top Button” and the “Home” buttons at the same time followed by a quick release. You will see a notification appear on your screen that will include a preview of the captured image. You can click the image to edit it and send it.
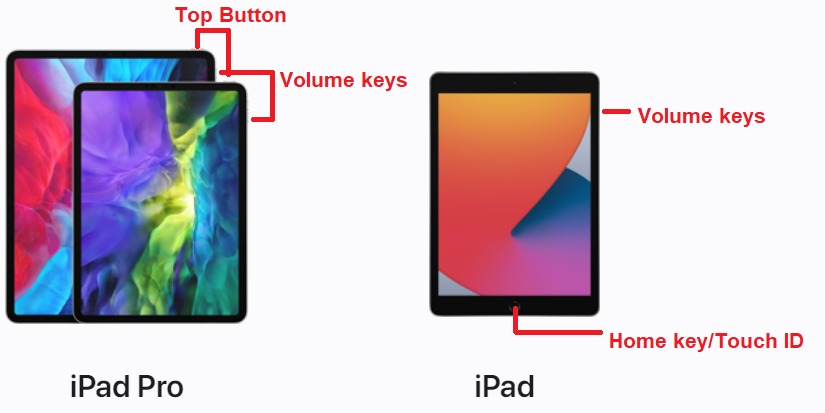
How to make a screenshot on an iPad that has Touch ID or a Face ID?
The instructions are no different from those listed above for the iPhones. We can thank Apple for keeping their designs consistent across devices. You can find the screenshots you have made by opening the Photos app on your device then go into Albums and then into Screenshots.
How to record your screen on video on iPad and iPhone?
Both device types from Apple support screen recording, but you will have to add the screen recorder function to your Control Center first. You can do that by going into Settings > Control Center > More Controls > + Screen Recording. Now you can launch the Screen Recording from the Control Center which is accessible with a brief swipe from the top of your screen.
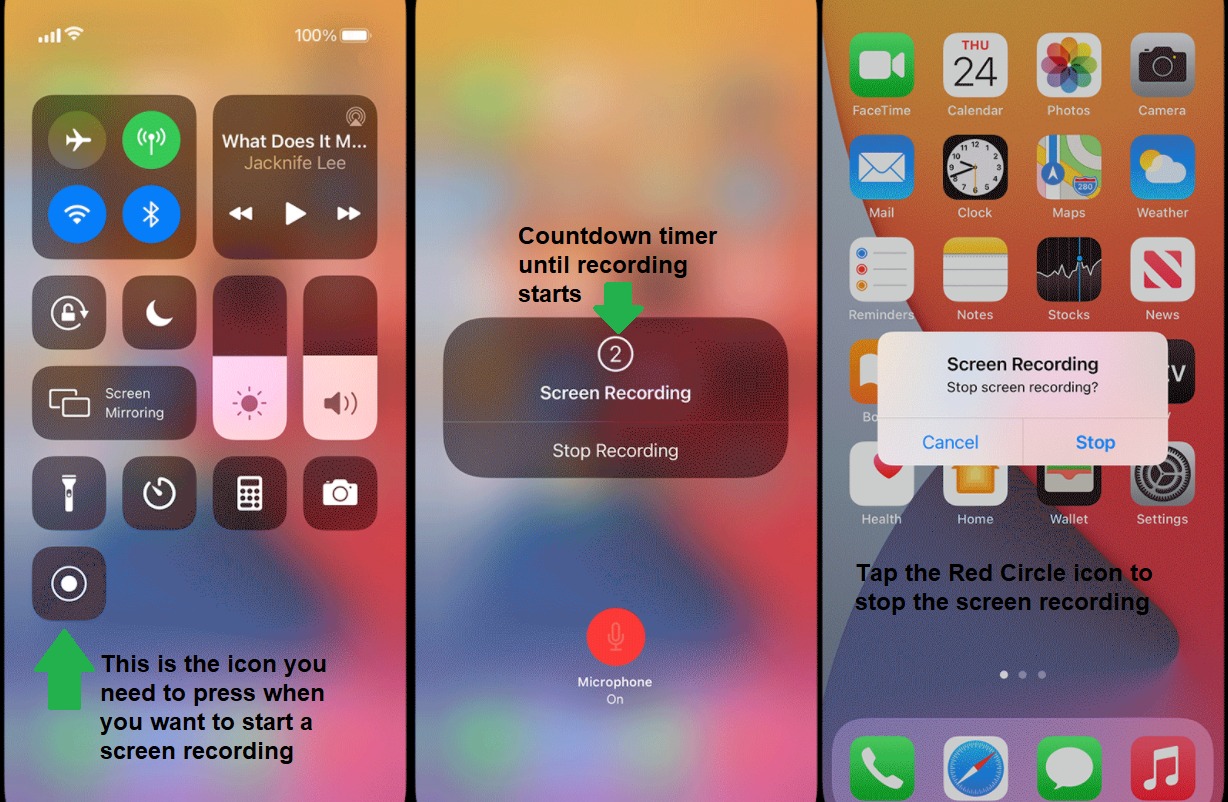
The screen recordings will include feed from your microphone so you will be able to have your voice in the background along with any sounds produced by the device. The files recorded from your screen are saved to the built-in memory, but you can later move them to a memory card if necessary. Please, note that you cannot record protected content like videos on Netflix, Amazon Prime, Hulu, as well as the content of protected folders.